LED
GPIO操作#
驱动操作GPIO#
参考03模板1-最简单的通用框架模板/GPIO子系统
使用LED子系统的函数。在入口函数中设置gpio为输出模式,先请求gpio然后设置。
在出口函数中释放gpio
读写函数:调用gpio子系统的gpio_get_value、gpio_set_value来读取、设置gpio的值
APP操作LED逻辑#
- 写:buf[0] - LED编号,buf[1] - 设置电平值
- 读:buf[0] - LED编号,(驱动程序返回buf[0] - LED编号,buf[1] - 电平值)
imx6ull gpio编号#
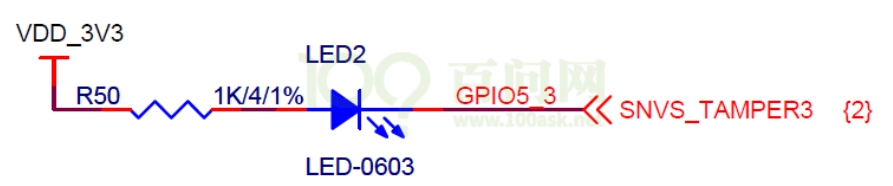
查看imx6ull GPIO5_3的gpio号:注意这里的GPIO编号是从0开始的,开发板的数据手册与原理图的编号是从1开始的。所以,GPIO5_0是128,GPIO5_3就是131.
公式是
开发板操作如下:
装载驱动程序,执行应用程序:
STM32MP157 gpio编号#
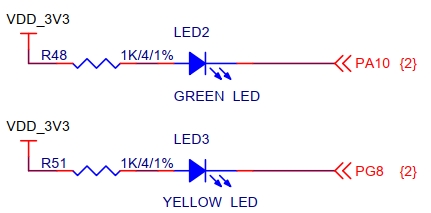
同样
PA10编号:10 PG8编号:96+8 = 104
如果出现内核版本不匹配,可以参考《完全开发手册》重新编译下载内核到开发板。
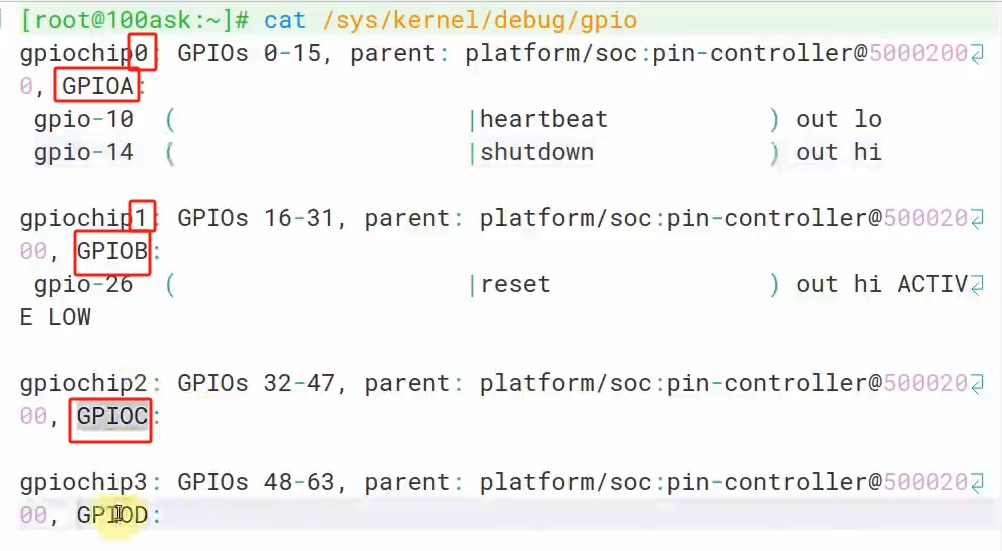
注意PA10已经被使用为heartbeat心跳灯功能。需要修改设备树,在~/100ask_stm32mp157_pro-sdk/Linux-5.4$ 下
把其中imx6ull-gpioa的定义disable掉。
编译设备树:~/100ask_stm32mp157_pro-sdk/Linux-5.4
替换设备树:
然后可以查看一下led的状态
D1H gpio编号#

这个LED的逻辑相反,高电平点亮,低电平熄灭。
查看GPIO:
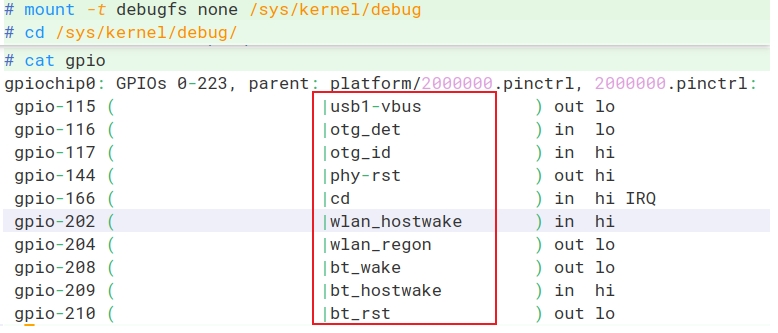
在arch/risc/boot/dts/board.dts设备树里搜索上图的红框,确定对应引脚是哪个,然后根据编号推出:
- 每个port占据32个引脚编号
- ABCD..对应0123..
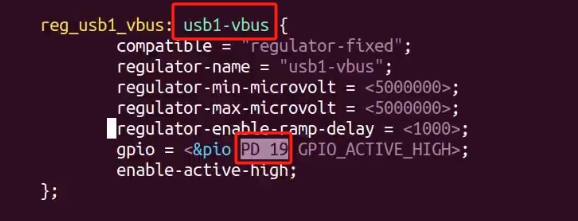
查到PD19 – 115,PE16 – 144 ,则PE19 – 147,每组GPIO占32个编号。
公式就是(prot - ‘A’) 32 + pin。 PD19 = 3 32 + 19 = 115
则PC1 = 2 * 32 + 1 = 65
请点击左侧菜单(移动端为右下角)选择要查看的所有笔记吧。